
Have you ever wondered how to start fermenting and make your own sauerkraut or tangy kimchi at home? Or perhaps you’ve been intrigued by the growing popularity of fermented foods and want to explore this ancient culinary technique. Look no further! In this guide, we will dive into the exciting world of fermentation and provide you with all the information you need to start fermenting your own delicious creations.
Fermentation is not only a fantastic way to preserve food but also a gateway to unlocking new flavors and nutritional benefits. Plus, it’s a fun and rewarding process that allows you to become an active participant in your food’s transformation. So, let’s roll up our sleeves, gather our ingredients, and embark on this fermentation adventure together!
Understanding Fermentation
Before we jump into the practical aspects of how to start fermenting, let’s take a moment to understand what fermentation is all about. At its core, fermentation is a natural metabolic process that converts sugars and carbohydrates into alcohol, acids, or gases. This transformative process is facilitated by microorganisms such as bacteria and yeasts, which break down the food’s complex compounds, resulting in deliciously tangy and probiotic-rich products.
Different types of fermentation exist, including lactic acid fermentation, alcoholic fermentation, and acetic acid fermentation. Each type of fermentation offers unique flavors and characteristics, depending on the microorganisms involved and the ingredients used. Understanding the science behind fermentation allows us to appreciate the magic happening within our fermentation vessels.
Getting Started
To begin your fermentation journey, you’ll need some basic equipment and ingredients. While the specific requirements may vary depending on the type of fermentation you choose, there are a few essentials that remain constant. Firstly, ensure you have clean jars or fermentation vessels, preferably made of glass or ceramic. These vessels provide a safe and stable environment for the fermentation process.
Cleanliness is of utmost importance in fermentation, as it helps prevent unwanted bacteria or molds from hijacking your fermentation. Make sure to sterilize your equipment and wash your hands thoroughly before handling any ingredients. Maintaining a clean environment will greatly increase the chances of successful fermentation.
Selecting Your Ingredients
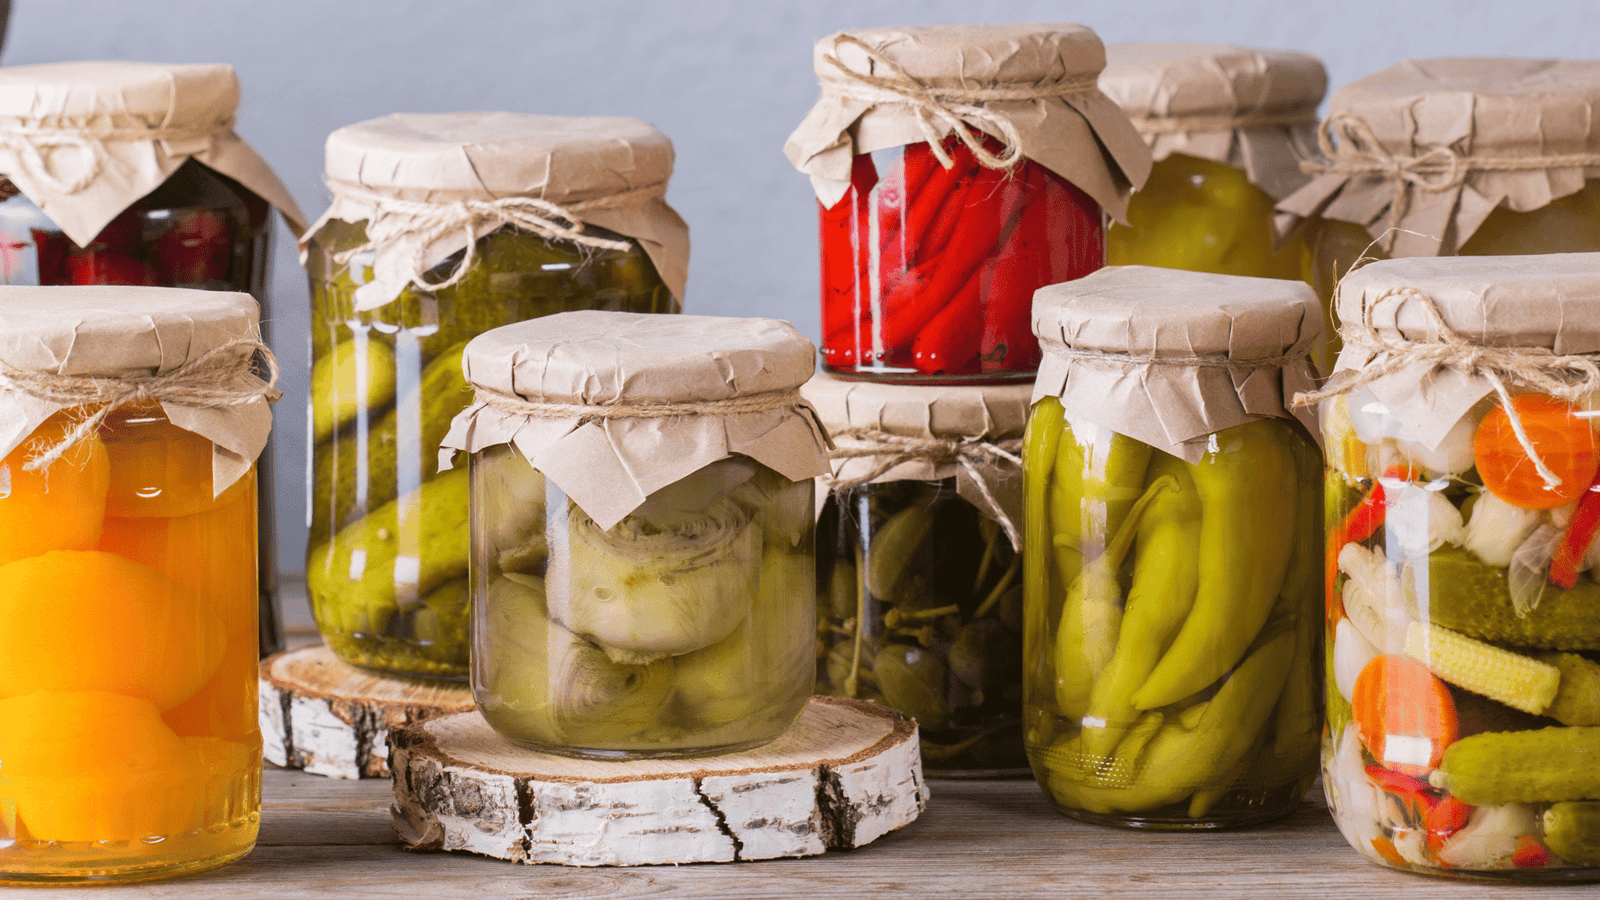
When it comes to fermentation, the quality and freshness of your ingredients play a crucial role. Opt for organic fruits and vegetables whenever possible, as they tend to yield better results. Carrots, cabbage, cucumbers, and beets are popular choices for beginners, but don’t be afraid to get creative and experiment with other produce as well.
⭐ At SmoothiePerks, we’ve written a blog post about Fermented Pickles – which you might be interested in reading.
To enhance the flavors of your fermented creations, consider adding additional seasonings and flavorings. Garlic, ginger, dill, and chili flakes are just a few examples of ingredients that can add a delightful twist to your fermented foods. The possibilities are endless, so feel free to tailor your ferments to suit your taste preferences.
Preparing for Fermentation
Before you start fermenting, it’s essential to prepare your ingredients properly. Begin by washing your fruits or vegetables thoroughly to remove any dirt or debris. For certain ferments, like sauerkraut, shredding or thinly slicing the cabbage or other vegetables is recommended to facilitate the fermentation process.
Next, you’ll need to create a brine or a starter culture. The brine acts as a preserving agent and provides a suitable environment for the beneficial bacteria to thrive. It typically consists of water and salt, but some ferments may require a specific starter culture or whey from a previous fermentation. Follow the recipe instructions or fermentation guide to ensure you have the right brine or starter culture for your specific ferment.
The Fermentation Process
Now that your ingredients are prepped and your brine or starter culture is ready, it’s time to start the fermentation process. Begin by adding your ingredients to the fermentation vessel, packing them tightly to remove any air pockets. Pour the brine or starter culture over the ingredients, making sure they are fully submerged.
Controlling the temperature and environment is crucial during fermentation. Most ferments prefer a temperature range between 60°F to 75°F (15°C to 24°C). Find a cool spot in your home, away from direct sunlight and extreme temperature fluctuations, to place your fermenting jars. Remember to burp your jars daily to release any built-up gases and prevent excess pressure.
Troubleshooting and Tips
As with any culinary endeavor, fermentation may sometimes come with challenges. Don’t fret! Here are a few common issues you might encounter and some tips on how to troubleshoot them:
- Mold growth: If you spot mold on the surface of your ferment, discard the entire batch to avoid potential health risks. To prevent mold growth, ensure your ingredients are fully submerged in the brine and avoid using iodized salt, as it can inhibit bacterial growth.
- Soft or slimy texture: This can occur if your ferment has been contaminated with unwanted bacteria. Double-check your sanitation practices and make sure your ingredients are fresh and properly washed. If the issue persists, consider using a starter culture or whey from a reliable source.
- Unpleasant odor: While fermentation does produce unique aromas, an overpowering or rotten smell is a sign of spoilage. Trust your senses, and if something smells off, it’s best to discard the ferment.
To ensure successful fermentation, follow these tips:
- Use non-chlorinated water when making the brine.
- Keep an eye on the temperature and make adjustments if necessary.
- Don’t rush the process; fermentation takes time.
- Taste your ferment throughout the process to gauge its progress.
Fermentation Time
The duration of fermentation varies depending on the type of food and your desired flavor profile. While some ferments, like sauerkraut, can be ready in as little as a week, others, such as kombucha or sourdough starter, may take several weeks or even months to develop their full flavors.
Keep an eye on your ferment and taste it regularly to determine its readiness. Once it reaches your desired level of tanginess or complexity, you can move on to the next step.
Storing and Enjoying Fermented Foods
Once your ferment is ready, it’s time to store it properly to preserve its flavors and nutritional benefits. Transfer the fermented food to clean, airtight containers and store them in the refrigerator. The cold temperature slows down the fermentation process, allowing you to enjoy your creations for an extended period.
There are numerous ways to incorporate fermented foods into your meals. Use sauerkraut as a flavorful topping for sandwiches or hot dogs, or add fermented vegetables to salads and Buddha bowls for an extra probiotic kick. Get creative and experiment with different recipes to discover how fermented foods can elevate your culinary adventures.
⭐ At SmoothiePerks, we’ve written a blog post about the Benefits of Fermented Food – which you might be interested in reading.
Health and Safety Considerations
While fermentation is generally a safe and healthy method of food preservation, it’s essential to be aware of a few considerations:
- Allergies: If you have specific food allergies or sensitivities, take extra precautions when fermenting and consuming fermented foods. Always read ingredient labels carefully and consult with a healthcare professional if you have any concerns.
- Pregnancy: While fermented foods can be beneficial for gut health, pregnant individuals should exercise caution. Consult with your healthcare provider before consuming fermented foods during pregnancy to ensure they are safe for you and your baby.
- Quality control: Pay attention to the quality and freshness of your ingredients. Discard any ferment that shows signs of spoilage, as consuming spoiled or contaminated food can lead to foodborne illnesses.
Exploring Fermentation Variations
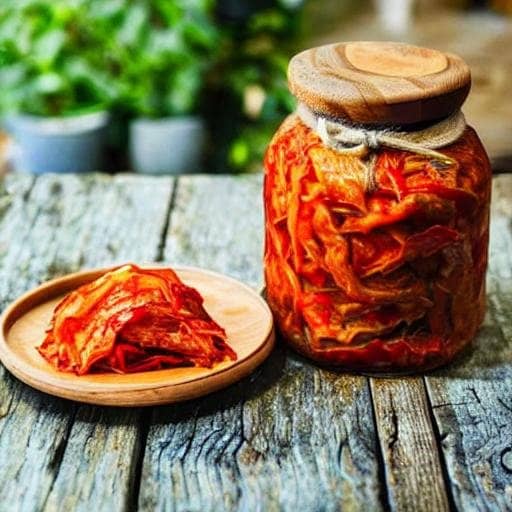
Now that you have a solid understanding of the basics, don’t be afraid to explore different fermentation methods and cultures. From traditional Korean kimchi to Indian dosa batter and Russian kvass, there’s a whole world of fermented delicacies waiting to be discovered. Each culture brings its unique flavors and techniques to the fermentation table, allowing you to broaden your culinary horizons.
Embrace the joy of experimentation and let your taste buds guide you on this flavorful journey. Remember, the art of fermentation is all about creativity, patience, and the willingness to explore new possibilities.
Frequently Asked Questions
FAQ 1: Can I ferment without using salt?
While salt is commonly used in fermentation to inhibit the growth of harmful bacteria, some recipes allow for salt-free fermentation. However, omitting salt increases the risk of spoilage, so it’s crucial to follow specific instructions or use alternative methods like whey or starter cultures.
FAQ 2: How can I tell if my fermentation has gone bad?
Spoiled fermentation is usually accompanied by foul odors, unusual colors, or slimy textures. Trust your senses, and if anything seems off or unpleasant, it’s best to discard the ferment and start fresh.
FAQ 3: What if I don’t have access to fresh produce?
Fresh produce is ideal for fermentation, but if it’s not readily available, you can try using frozen fruits or vegetables. However, the texture and flavor may differ from fresh produce, so keep that in mind.
FAQ 4: Is it safe to consume fermented foods during pregnancy?
While fermented foods can be a valuable addition to a healthy diet, it’s essential to consult with your healthcare provider before consuming them during pregnancy. They can provide personalized advice based on your specific circumstances.
FAQ 5: Can I use tap water for fermentation?
Using tap water for fermentation is generally safe, as long as it’s chlorine-free. Chlorine can hinder the growth of beneficial bacteria, so if your tap water contains chlorine, consider using filtered or bottled water instead.
Conclusion
Congratulations! You’ve now learned the essentials of starting your own fermentation adventure. By harnessing the power of microorganisms and exploring the diverse flavors of fermented foods, you can embark on a culinary journey like no other. Remember to have fun, embrace experimentation, and savor the incredible transformations happening within your fermentation vessels. So go ahead, gather your ingredients, and let the magic of fermentation begin!
Disclaimer:
Please note that the information provided in this blog post is for general informational purposes only and does not constitute professional advice. I am not an expert. The content of this blog post is based on my personal experiences, research, and opinions. I do not assume any responsibility or liability for any consequences resulting from the use of this information. By reading this blog post, you acknowledge and accept that the information provided here is not a substitute for professional advice.
ⓘ AFFILIATE DISCLAIMER
Please assume any links to 3rd party products are affiliate links for which I may receive a small payment from the vendor if you decide to sign up or purchase – at no cost to you.


2 thoughts on “How To Start Fermenting”